You can purchase either the m1 or m2 variant of the LM42P. These machines are available as DIY kits or fully assembled, depending on your preference. Based on your budget and level of maker experience, you can choose the components you need.
Each machine comes with a complete Building Guide (PDF), which includes everything required to build it yourself: a full parts list, specialized jigs (called drillator), 3D-printable files, firmware code, schematics, and more.
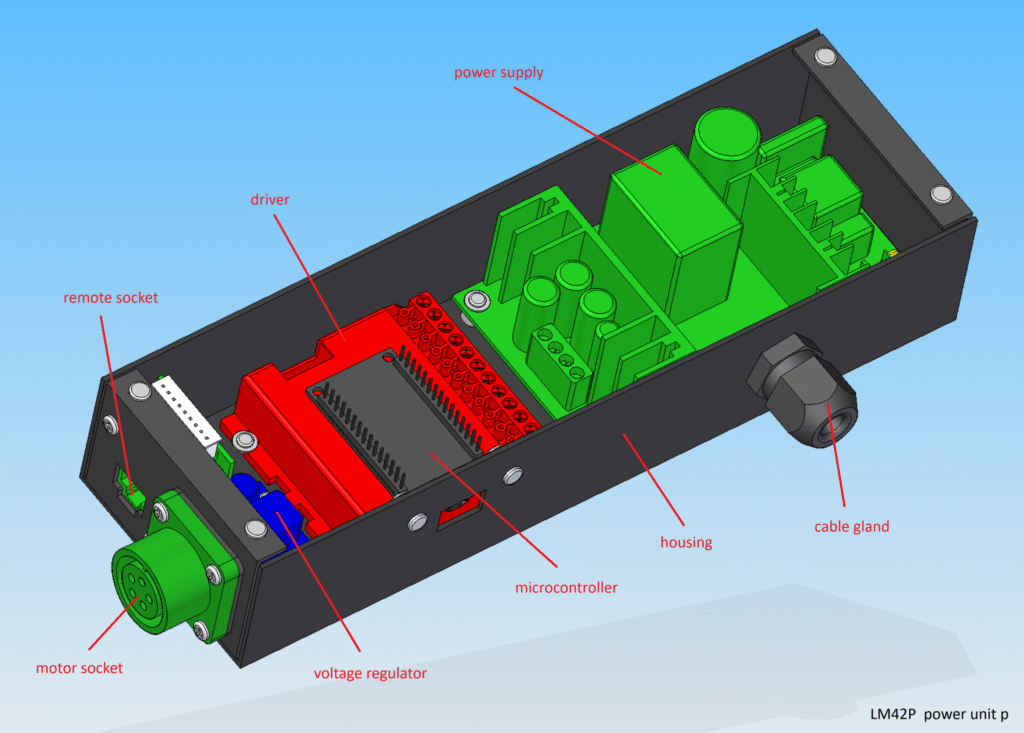
The power unit is the same for all LM42P machines. There are two power unit variants available: one with lower power using a TB6600 driver, and one with higher performance, called power unit p, which uses a Gecko driver.
Want to learn more? Check out the user manual in the SUPPORT menu — it walks you through all the machine parts and shows you how to use them.